- Home
- Education Sector
- Student Developer Blog
- Using continuous integration with Azure & GitHub
- Subscribe to RSS Feed
- Mark as New
- Mark as Read
- Bookmark
- Subscribe
- Printer Friendly Page
- Report Inappropriate Content
To keep your source code backed up and constantly up-to-date with your latest changes, you can take advantage of the Azure platform’s continuous deployment with GitHub . Whenever you commit code to your GitHub repo, that code can be automatically synced up with your Azure Web app, without any extra effort. Here are the basic steps that we’ll cover when first setting up continuous integration:
- Setting up a GitHub repository
- Creating a new Web app in Azure
- Setting up continuous integration
- Updating and committing new code
If you don’t currently have a GitHub account, you’ll want to set one up and then log into it to follow the rest of this walkthrough. If you have a brand-new account, or one without any repositories, your browser will look like this:

| Initial screen for new GitHub accounts. |
On this screen, you’ll want to click on the + New Repository button, which will create a new repository for your code in your GitHub account.

| Green + New Repository button for creating new repos. |
Once you’ve clicked the + New Repository button , you’ll see a new screen that allows you to make a new Repository name , a description , select either public or private settings, and whether to initialize with a README (we’ll leave this unchecked for our walkthrough). Once you’re satisfied with your repo’s unique name and descriptive text, click on the Create repository button to create this new repo with no code in it.

| GitHub repository setup screen and options. |
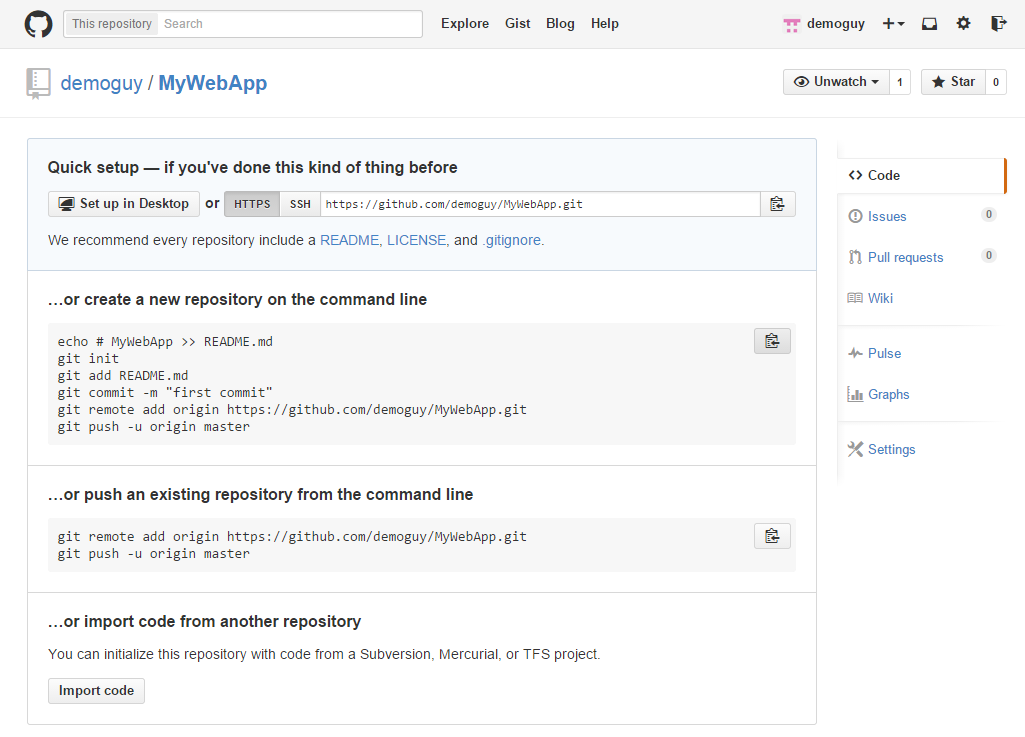
| Brand-new GitHub repository waiting for your code. |
We want to make sure that this repository works, so you’ll want to use your favorite Git client to commit code back to the repo you’ve created. There are many different Git clients available, such as GitHub for Windows , posh-git or git bash . Create or use any file that you’d like (and don’t mind sharing publicly) and then use your Git client to commit and push your file into the repository.
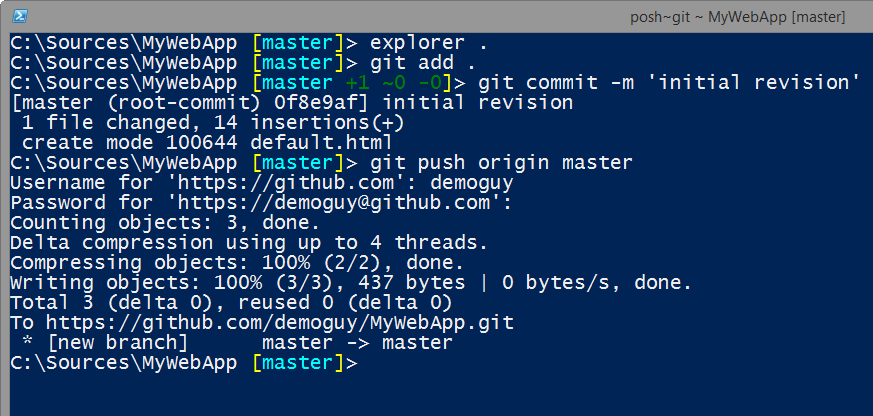
| Example of using posh-git client command line to add a file. |
Back in your web browser, refresh to see the newly-added file in your repository.

| The default.html file added via the Git client is now visible in the repository. |
Step 2: Creating a new Web app in Azure
We’ve confirmed that our GitHub repository is working, since committing and pushing changes is confirmed, so now we work on creating our Web app in Microsoft Azure .
In your favorite browser, open the Azure website , log in, and then open the Azure Portal.

| Access your account either from the Account or Sign In buttons on the Microsoft Azure site. |

| Access the Azure Portal. |

| The main Azure Portal, a convenient dashboard for checking your Azure project status. |

From the main Azure Portal , in the lower right-hand corner, click on NEW to start creating a new web app.
After selecting the NEW button, you’ll be offered a menu full of different things you can create on Azure, but for now, focus on Web+Mobile , and then from the Web+Mobile menu , choose Web app .

| Menus for selecting and creating a new Web app. |
Once you select Web app , a new menu will open up to the right side. You’ll want to enter a URL for your project, and choose to name and create a New AppService Plan . Keep the pricing on F1 Free for now, and create a New Resource Group . Azure will let you know if names are taken, so keep adjusting your naming if it turns out a name you’d like is unavailable. Keep the location used for your cloud development on South Central US for now, though in future projects you’ll be able to customize this if you’d like. Leave the checkbox for Add to Startboard checked, so that it’s easier to access this work in the near future.
Once everything has been entered to your liking, hit the Create button.

| Completing the details for the new Web app. |

| New tile depicting Web app creation in-process. |
Microsoft Azure will work on setting everything up and initial creation of your Web app, and then the tile will appear on your Startboard once it’s ready.
Click on your web app’s tile to open up the related display, which gives you information about your web app’s live performance.

| Web app information blade. |
Step 3: Setting up continuous integration
Now that the app is ready for your work, you’ll want to connect it with your GitHub repository so that changes are synced across both. First thing is to go into Settings .

| Settings menu icon available from the Web app’s main page. |
This opens up a new blade with all of the settings available, and we want to select Deployment credentials . This will open up another new blade next to the Settings blade, called Set deployment credentials . Fill in the appropriate username and password for your deployments to use.

| Blades for Deployment credentials-related settings. |
Now that you’ve set that up, go back to the main blade for your web app and scroll down, far below the Monitoring graph. Toward the bottom, you’ll find a section for Deployment , and a tile for Set up continuous deployment . Go ahead and click on that box and we’ll work on the main setup for continuous integration with GitHub.
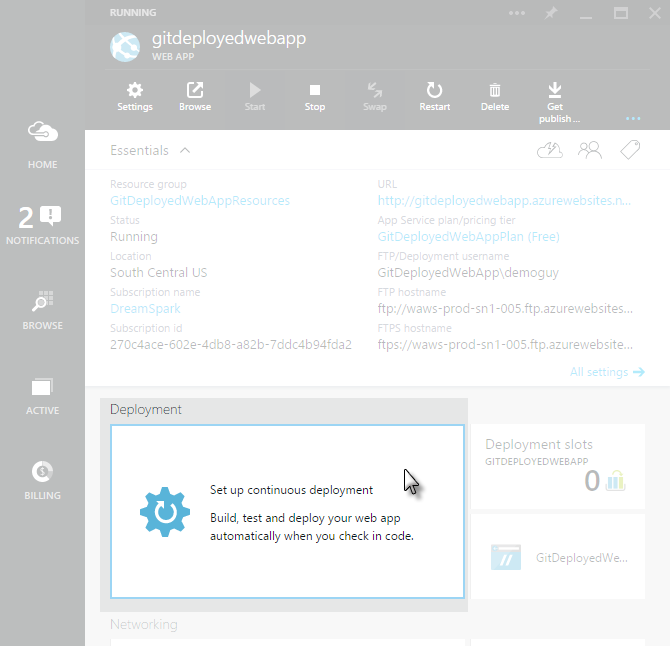
| Click the Set up continuous deployment tile to proceed. |
The Continuous Deployment menu blade will open up, so Choose Source , and then from that blade, select GitHub from the list of providers.

| Select GitHub as your source for this Web app. |
After you’ve selected GitHub as your source, you may be prompted to authorize your GitHub account to enable the connection between GitHub and your Azure web app . Log in with your GitHub credentials (same as those used to create your repository), and then once you’ve authorized the connection between Azure and GitHub, you’ll be able to select the repository you want to integrate.
Your Continuous Deployment blade will update with the chosen source and authorization name, and then you will need to choose the GitHub repository to integrate with under Choose Project .
Once you’ve selected your repo, click the OK button in the Continuous Deployment blade.

| Select your repository from the Choose Project blade, click OK in Continuous Deployment. |
After you click OK, your code is fetched from the specified branch in your GitHub repository and deployed to Azure automatically.

| Fetching code in progress. |
The deployment status will update on the Azure portal’s Deployments blade as soon as the deployment completes, and then you can see the Active Deployment under the portal blade.

| Successful code deployment, and updated Azure information. |
Now click on the Browse button in the Web app blade’s toolbar to see your code running in your Azure Web app, in your browser.

| Click Browse to see your code in action. |

| Updated site visible in-browser. |
Step 4: Updating and committing new code
Now that we’ve confirmed successful deployment of your code, we can work on updating it and confirming that those changes are pushed forward.
Open the GitHub repository where you committed your code, and then open one of those committed files using the Edit this file toolbar icon.

| In the upper-right corner, click on Edit this file to start making changes on GitHub. |
In our example, we’ll add a new paragraph via GitHub, below our header.
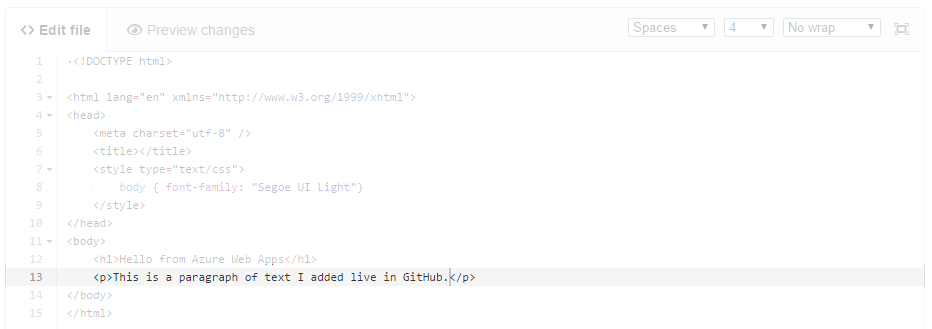
| New paragraph added to the file on GitHub. |
Once you’re satisfied with your code updates, you’ll want to consider adding a commit message explaining the changes. Below the editor area, there’s a Commit changes section where coders can either take the default message, or provide a more detailed explanation to help give context to the changes. When you finish updating the commit message, go ahead and click on the Commit changes button to save your work to the repository.
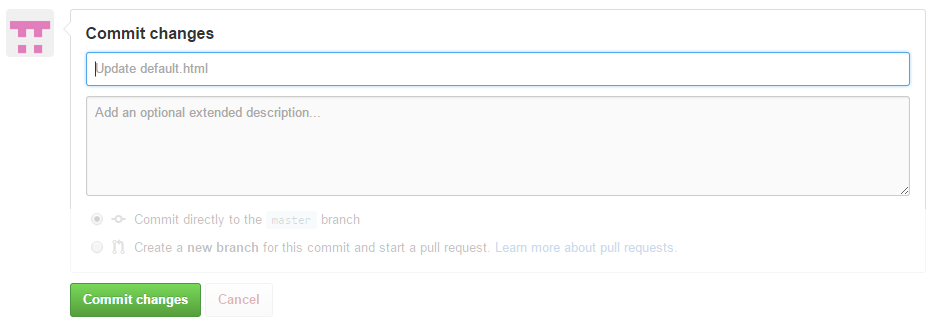
| Main commit changes section on GitHub. |
Once your code is committed to your repo, continuous integration kicks in and the code on GitHub will be pulled into your Azure Web app and redeployed automatically . If you open up and watch the Azure Portal again after your GitHub commit, the change is quickly pulled in and deployed to your live site .

| Latest changes appear in Azure after GitHub repository’s code is updated. |
Now you can refresh your browser to see your changes live on your Azure web app.

| Updated version of the Web app in-browser |
You must be a registered user to add a comment. If you've already registered, sign in. Otherwise, register and sign in.