- Home
- Security, Compliance, and Identity
- Core Infrastructure and Security Blog
- MDT 2013 - Part II: Create a Deployment Task Sequence and Deploy a Custom Windows Server 2012 R2 Base OS Image
- Subscribe to RSS Feed
- Mark as New
- Mark as Read
- Bookmark
- Subscribe
- Printer Friendly Page
- Report Inappropriate Content
First published on TechNet on Aug 11, 2014
Hey there Mike Hildebrand here with Part Two of this MDT series. To catch up, go here and read Part One and then come back …
Picking up where we left off, we had MDT setup and running and we'd captured an image of a reference server system.
In Part Two, we'll create a Task Sequence with some custom elements and use it to deploy the reference image we created in Part One onto a physical and a virtual machine.
Let's get crackin…
Create a Deployment Task Sequence
Open the MDT Workbench UI and right-click "Task Sequences" and choose "New Task Sequence" to launch the Wizard:
-
As mentioned in Part One, use a solid standard for your Task Sequence IDs and Names, and description/comments fields for who/what/when
- Compare the screenshot below to the same screen in Part One – one has a little info; one has a lot of info
- Charity's Tip here – "keep it simple"
-
Choose "Standard Server Task Sequence" for the Template…
-
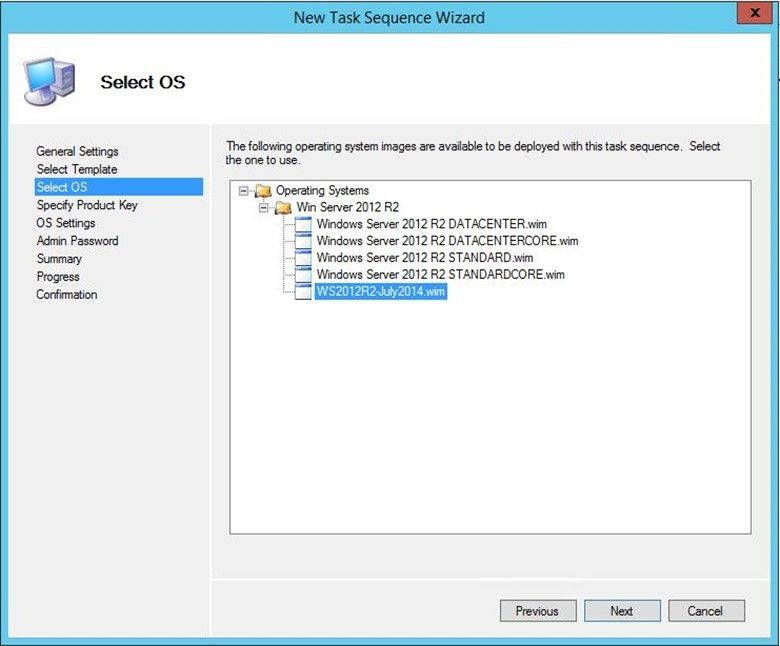
Choose the customized WIM that was captured earlier…
-
Depending on your media and licensing situation, you can enter a key here or plan to use a KMS system for activation…
- Charity's Tip – if your company has Volume License Keys, DON'T enter one here – you'll only need a Product Key here if you're using MSDN or retail box software that came with a product key
-
Volume License Media will activate against a properly configured KMS or AD-Based Activation system once the deployment completes
- Charity has a great post on KMS here - http://blogs.technet.com/b/askpfeplat/archive/2013/02/04/active-directory-based-activation-vs-key-m...
-
Enter the desired information for these fields…
-
Enter a password for the local Administrator account or choose to get prompted for one when you build a system
-
This should be considered a 'one-time use' password, only used by this specific build process to auto-login during the build process.
- The password information is obfuscated in the deployment process but it should be considered 'discoverable'
- Do not use one of your corporate standard passwords here
-
Be sure you execute your normal local administrator password change processes on the deployed OS once the deployment is complete
-
-
Review the Summary and click Next… then Finish.


Customize the New Deployment Task Sequence
We now have a Task Sequence but we need to add some additional Task Sequence "Actions" to meet our needs.
I'm going to use the 'Apply Network Settings' Action to specify a particular IP address for a DNS server, but use DHCP to get the IP address for the machine:
- Right-click the new Task Sequence in the MDT UI and choose 'Properties' then click the Task Sequence Tab.
- Click the "Add" drop-down
-
Choose "Settings" > "Apply Network Settings"
- Use the Up/Down green arrow buttons to position the Apply Network Settings action AFTER the PostInstall group of actions.
-
Then, use those same buttons to move the Restart Computer action that was in the Postinstall group to AFTER your Apply Network Settings action (see the screenshot below)
- These steps make sure the NIC settings get applied at a point when the deployment is far enough along that the OS can 'see' the NIC but before an OS reboot might prevent the settings from sticking.
-
Highlight the "Apply Network Settings" action and click the "star" button to start the Network Settings Wizard:
- Give the entry a name – 'NIC' in the example here


- This names the first network adapter in the OS, usually defined in the OS as 'Local Area Connection'

8. Leave the setting to 'Obtain an IP address automatically' selected
9. Select the DNS tab
-
-
Select 'Use the following DNS Servers'
- Click the yellow 'star' and enter the IP address of the desired DNS server in the blank
- Click Add > OK
-


11. Click the OS Info tab
12. Click 'Edit Unattend.xml'
- The first time you do this to a given OS image, the image is 'cataloged' and this takes several minutes …

13. Eventually, the "Windows System Image Editor" dialog box will open the Unattend.XML file associated with this Task Sequence.
14. Expand/drill-down in the Answer File section (middle pane of the UI) until you get to '4 specialize'
15. Drill-down into that as shown in the screenshot to get to the 'copyProfile' setting and set it to "true"
- This is the magic moment where many of our customizations from our base image will get copied over to the Default User profile during the new OS deployment ( most-notably, the customized Start screen layout )
- Any user who logs into the new system will get a profile created that is based on that Default user profile and those settings/configs will be set

- Unrelated-but-interesting note: TimeZone shown here is a legacy setting and doesn't apply to OSes beyond Vista

Deploy the Image via the Customized Deployment Task Sequence
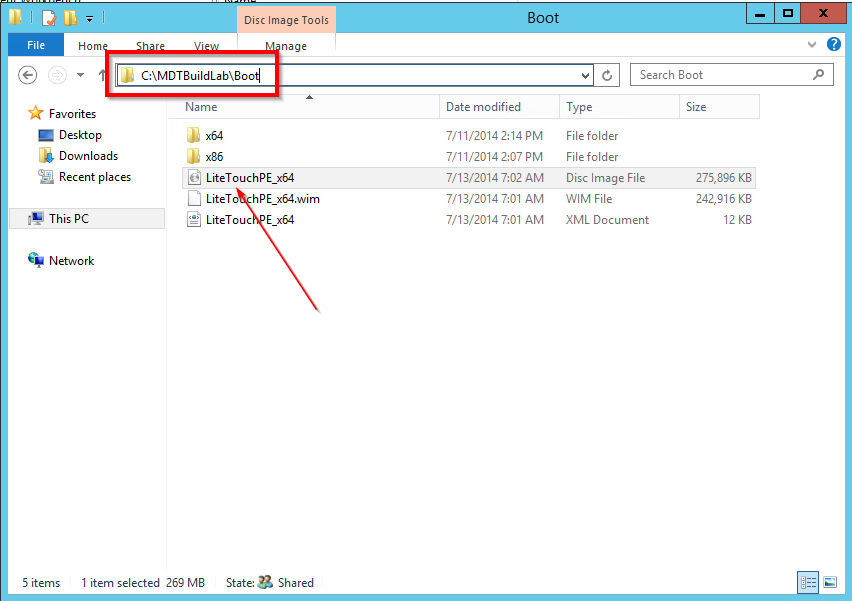
Burn the bootable "LiteTouchPE" ISO image for the appropriate architecture to a USB stick for a physical deployment or simply mount the ISO in a VM for a virtual deployment
- Note – this ISO does NOT include the entire WIM/image, this is just a boot image to initiate pulling down the customized build/image
For this first deployment example, I deployed to a virtual machine (booted via the mounted ISO file).
-
Click the 'Run the Deployment Wizard…' button…
-
Enter credentials to allow connection back to the MDT server/share and click OK:
-
The MDT Rules are then processed…
-
Choose the custom Deployment Task Sequence we created earlier
- Note the details that display here for the name and "comments" we provided when we created the Task Sequence.
- If I'd listened to Charity, it would be simple, yet clearly informative – do whatever works for you and your org/standards
-
Enter the desired settings for Computer name and domain join info
-
You can define the OU, too – nice touch, MDT dev team!
- Just make sure you use the correct LDAP path, in the correct "distinguished name" format
-
-
Note, per the Rules I defined in Part One, locale settings are indeed grayed out and my time zone defaults to CST (I am able to change it, if desired).
-
Expand the details and review – this simple step helped me avoid wasted time several times due to mistakes – then click Begin.
- Note: if you dig deeper into MDT, you can automate or pre-populate most (all) of the prior prompts via the customsettings.ini and/or bootstrap.ini files
- That is more advance and out of scope for this blog series.
-
The deployment begins…
-
There will be several reboots and auto-logins as the process continues…


- NOTE: I saw this fly-out appear during the build process but I didn't touch anything and the deployment process handled it fine, continuing on without user intervention:

Finally (hopefully?), you'll end up here, logged in and with a "Success" dialog box.
Click Finish to close the box and review your deployment:
-
- Desktop color? Check!
- Desktop icons? Check!
- BG info? Check!

Start screen layout? Check!
-
- Remember, this comes from the DEPLOYMENT Task Sequence edit of the Unattend.XML we did above - where we set the 'CopyProfile' entry to TRUE. This is NOT edited/set in the 'CAPTURE' Task Sequence from Part One
- This took me a bit to comprehend - I thought I needed to 'capture' the Start screen
- However, the Start screen and other profile settings are included in a captured OS.
- It is when we DEPLOY the OS that we need to tell the deployment process "copy the profile."
Note - you can only deploy a pre-defined customized Start screen on certain versions of Windows:
-
- Any GUI Windows Server 2012 or newer version
- Windows 8.x Enterprise
- Windows 8.x Pro that is domain-joined

Addendum – "What if I want to enter static IP settings on a given build?"
Well, the MDT folks have you covered here, too. This ain't their first build rodeo J
For this second deployment example, I deployed to a physical machine booted from the LiteTouch ISO burned to USB media.
-
Most of the screen-shots here (except the last one) are from a VM due to the ease of capturing them.
-
At the Welcome screen, click 'Configure with Static IP Address…' at the bottom…
- Uncheck the 'enable DHCP' box and that will light up the NIC settings fields.
-
Enter the NIC settings you want and click Finish…
-
Click the "Run the Deployment Wizard …" button and continue on…
-
Once the deployment completes, you'll see your static NIC settings you defined above are now set on your system. Awwwwwe YEEEAAAAHHH


Well folks, there you have it. MDT 2013 via a fairly simple, yet realistic "customized" Server OS deployment process. I hope you find MDT as amazing as I did - and I only scratched the surface.
If you haven't explored this tool yet but are curious, I hope the MDT posts on our blog get you going - you can do some great things without too much over-head or ramp-up time.
Kudos to the folks who work on the MDT (or BDD as it was once called) now and over the years! Here's a blog you should check out by folks who live and breathe deployment: http://blogs.technet.com/b/deploymentguys/
Super-thanks to Heath L., Charity, Kyle and Joao for their help in nailing down some of the technical details for this series, as well as my enterprising buddy, "Half-marathon" Crawford.
Cheers!
You must be a registered user to add a comment. If you've already registered, sign in. Otherwise, register and sign in.