Turn on suggestions
Auto-suggest helps you quickly narrow down your search results by suggesting possible matches as you type.
- Home
- Microsoft 365
- Modern Work App Consult Blog
- Support multiple languages in an Alexa Skill built with Alexa.NET
Support multiple languages in an Alexa Skill built with Alexa.NET
- Subscribe to RSS Feed
- Mark as New
- Mark as Read
- Bookmark
- Subscribe
- Printer Friendly Page
- Report Inappropriate Content
Published
Jan 15 2019 03:27 PM
1,748
Views
Jan 15 2019
03:27 PM
Jan 15 2019
03:27 PM
First published on MSDN on Nov 08, 2018
In the previous posts (see here and here ) we have learned how we can build a skill for Alexa, the Amazon vocal assistant, using platforms and tools which are familiar for a Microsoft developer. The skill is hosted using Azure Function; it's based on .NET Core; it's leveraging a C# library called Alexa.NET which makes easy to deal with the requests and responses required by the Alexa platform.
At the end of the process we had a skill which supported only one language, the default one: English. One of the reasons why I got closer with the Alexa ecosystem, instead, was the release of the platform also in Italy, with full support for the Italian language.
In this post we'll take a look how we can add multi-language support to an Alexa skill. Also in this case we will need to work on two aspects: the interaction model and the code of the Azure Function. We're going to use, as a building block, the same project we have started to create in the previous posts : a skill to deliver the latest news from the AppConsult blog.
Adding a new language to your skill is easy. Once you have logged in to the Alexa Developer Console , open your skill and, in the top left corner, you will find a dropdown with the list of supported languages. For the moment, you will see only English (US) . Click on the dropdown and choose Language settings :

In the next page you'll have the option to add one or more languages:

The choice will be limited to the languages where Alexa is supported. In my case, I have chosen Italian and then pressed Save .
By default, the dashboard doesn't provide a way to move the existing configuration to another language. You will, notice, in fact, that the interaction model of the new language will contain only the built-in intents. All the custom ones we've added to the English model are missing.

The easiest way to avoid recreating everything from scratch is using the JSON editor. Every interaction model, in fact, is represented by a JSON payload, which we can see by opening the JSON Editor section. First, return back to the English version of the model, then choose JSON Editor from the panel:

The new page will display the full JSON of the current interaction model. As you can see, it's quite easy to decipher. You have properties to store the invocation name, the collection of intents and, for each of them, the name and, optionally, the slots and the samples.

Copy the whole JSON in the clipboard, then switch to the new language you've added (Italian, in my case) and open again the JSON editor. Paste the JSON, replacing the default one. Then press Save Model at the top. The left panel will immediately be updated to reflect the changes you've made. You will see that now, also for the Italian language, you have access to the LastPosts instance we have previously created for the English model.
Based on the new language you've added, you may see also something different like in the following image:

As you can see, the intent AMAZON.FallbackIntent is listed as a regular intent and not as a built-in one. The reason is that not all the languages support the same set of built-in intents. In this case, we can safely remove the AMAZON.FallbackIntent by pressing the icon near its name.
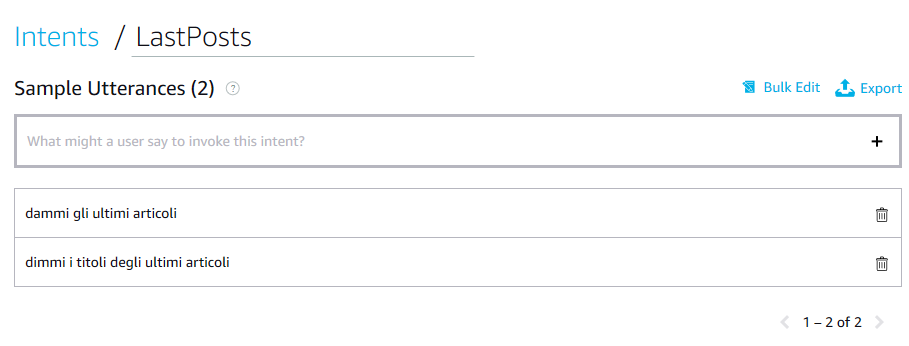
Now, as last step, we need to edit each intent we have just imported and change the sample utterances or the slots to match the new language. If you click on your intents, in fact, you will see that the utterances have just been copied over, so they will still be in English. In my case, I've translated them in Italian:
One last thing you should do is to check the Invocation section. Based on the kind of skill you've created, it could make sense also to translate its name, so that it's easier to activate it also in another language. Remember, in fact, that the name is the one that must be invoked every time you want to start interacting with a 3rd party skill ( "Alexa, open AppConsult" ).
We're done! Save the model and rebuild it, to make sure that all the changes we've just made are now applied.
Now it's time to update the code of our function, so that it can return different messages based on the invocation language.
Unfortunately, for our scenario, there isn't an elegant solution that does everything for us like resources files for Windows applications. The function is just an endpoint which is triggered by the Alexa servers, so it can't know which is the current execution context.
The information about the current language is included in the JSON payload sent by Alexa. Alexa.NET gives us this information as part of the properties exposed by the SkillRequest class:
Now we can use this information to start building conditions and to make sure that the various intents return the most appropriate message, like this:
However, as you can see this approach can lead the code hard to read and a bit "clumsy". Imagine, in fact, that you have a more complex skill, which is capable of handling dozens of intents instead of just one and which supports more than 2 languages. The amount of if statements you have to write can be a bit overwhelming.
Thanks to an extension library for Alexa.NET it's possible to make the multi language support a little bit smarter. The library is called Alexa.NET.LocaleSpeech , it's available on GitHub and also as NuGet package .
First, let's install it in our Azure Function, by searching for it in the NuGet Package Manager.
Now let's write a helper method to setup the localization:
The method accepts as input the SkillRequest , which will be used to determine the current locale.
As first, we setup a new DictionaryLocaleSpeechStore , which works in a similar way as a resource file. It exposes a method called AddLanguage() , which accepts as input the culture code of the language and the list of messages. The second parameter is a Dictionary<string, object> , which means that every object is identified by a key (a unique identifier) and a value (the text of the message). Ideally, each language will contain the same list of keys, but with different values, since each text will be translated to the specific language.
The previous sample creates two dictionaries, one for Italian and one for English, with the text for the welcome message of the skill, which is identified by the Welcome key.
In the end, we create a LocaleSpeechFactory with the store we have just generated and we use it to return an ILocaleSpeech object. This is the object we're going to use to automatically retrieve the various messages in the correct language.
Let's see how we can change the if / else code we have previously written to use this new and better approach:
As you can see, the code is now much cleaner and easier to read. We can just call the asynchronous method Get() exposed by the ILocaleSpeech object we have just created, passing as parameter the key of the message, which is Welcome in this case. Automatically, the object will return us the proper message, based on the locale specified in the request sent by Alexa.
As you have noticed, we have passed a second null parameter to the Get() method. This is because the message we had to return was a simple one: it doesn't contain any parameter.
If, instead, we need to compose a more complex message with some dynamic element, we can pass them as a collection of strings in the second parameter. Let's see an example by adapting the custom intent handled by our skill (the one identified by the LastPosts keyword) to use this multi language approach.
First, let's add a new resource in our language dictionary:
As you can see, this new entry (identified by the key LastPosts ) has a placeholder for the position where we need to embed a dynamic content, which is the title of the article. This is the same syntax used by the string.Format() method. If you need to support more than one dynamic content, you can just add other placeholders in an incremental way ({1}, {2}, etc.).
Now we can just call the Get() method of the ILocaleSpeech object passing, as second parameter, an array with the list of parameters:
In this case, the array contains just one string, which is the title of the last published news retrieved from the RSS feed of this blog. In case the message includes more placeholders, you just have to add inside the array.
To test the skill you can continue to use the Alexa Simulator we have learned to use so far. In the top left corner you will have a drop down to switch from one language to another. Other than that, there are no differences. You can just type commands in your new language and check if they are properly handled:

In this post we have seen how you can extend the reach of your Alexa skill, by adding support for multiple languages. Unfortunately, being just a function invoked by a HTTP request coming from Alexa, we don't have a smart way to handle multiple locales like we can do with resources in a Windows application. However, thanks to an extension library for Alexa.NET, we can still optimize the code and make it cleaner and easier to read and maintain.
Remember that every update to the interaction model, including adding a new language, requires a new verification from Amazon. As such, after you have tested that everything is working also in the new languages you've added, you will need to submit your skill for a new certification. The "live" model and the "development" model will be kept separated so, during the development or the review process, the original model will continue to be available to users who are using the public version of the skill. As such, make sure that your Azure Function doesn't contain any change that could break the compatibility with the previous model, at least until the updated version is validated and certified.
You can download the updated sample code from GitHub .
Happy coding!
In the previous posts (see here and here ) we have learned how we can build a skill for Alexa, the Amazon vocal assistant, using platforms and tools which are familiar for a Microsoft developer. The skill is hosted using Azure Function; it's based on .NET Core; it's leveraging a C# library called Alexa.NET which makes easy to deal with the requests and responses required by the Alexa platform.
At the end of the process we had a skill which supported only one language, the default one: English. One of the reasons why I got closer with the Alexa ecosystem, instead, was the release of the platform also in Italy, with full support for the Italian language.
In this post we'll take a look how we can add multi-language support to an Alexa skill. Also in this case we will need to work on two aspects: the interaction model and the code of the Azure Function. We're going to use, as a building block, the same project we have started to create in the previous posts : a skill to deliver the latest news from the AppConsult blog.
Add a language to the interaction model
Adding a new language to your skill is easy. Once you have logged in to the Alexa Developer Console , open your skill and, in the top left corner, you will find a dropdown with the list of supported languages. For the moment, you will see only English (US) . Click on the dropdown and choose Language settings :
In the next page you'll have the option to add one or more languages:
The choice will be limited to the languages where Alexa is supported. In my case, I have chosen Italian and then pressed Save .
By default, the dashboard doesn't provide a way to move the existing configuration to another language. You will, notice, in fact, that the interaction model of the new language will contain only the built-in intents. All the custom ones we've added to the English model are missing.
The easiest way to avoid recreating everything from scratch is using the JSON editor. Every interaction model, in fact, is represented by a JSON payload, which we can see by opening the JSON Editor section. First, return back to the English version of the model, then choose JSON Editor from the panel:
The new page will display the full JSON of the current interaction model. As you can see, it's quite easy to decipher. You have properties to store the invocation name, the collection of intents and, for each of them, the name and, optionally, the slots and the samples.
Copy the whole JSON in the clipboard, then switch to the new language you've added (Italian, in my case) and open again the JSON editor. Paste the JSON, replacing the default one. Then press Save Model at the top. The left panel will immediately be updated to reflect the changes you've made. You will see that now, also for the Italian language, you have access to the LastPosts instance we have previously created for the English model.
Based on the new language you've added, you may see also something different like in the following image:
As you can see, the intent AMAZON.FallbackIntent is listed as a regular intent and not as a built-in one. The reason is that not all the languages support the same set of built-in intents. In this case, we can safely remove the AMAZON.FallbackIntent by pressing the icon near its name.
Now, as last step, we need to edit each intent we have just imported and change the sample utterances or the slots to match the new language. If you click on your intents, in fact, you will see that the utterances have just been copied over, so they will still be in English. In my case, I've translated them in Italian:
One last thing you should do is to check the Invocation section. Based on the kind of skill you've created, it could make sense also to translate its name, so that it's easier to activate it also in another language. Remember, in fact, that the name is the one that must be invoked every time you want to start interacting with a 3rd party skill ( "Alexa, open AppConsult" ).
We're done! Save the model and rebuild it, to make sure that all the changes we've just made are now applied.
Updating the Azure Function
Now it's time to update the code of our function, so that it can return different messages based on the invocation language.
Unfortunately, for our scenario, there isn't an elegant solution that does everything for us like resources files for Windows applications. The function is just an endpoint which is triggered by the Alexa servers, so it can't know which is the current execution context.
The information about the current language is included in the JSON payload sent by Alexa. Alexa.NET gives us this information as part of the properties exposed by the SkillRequest class:
   [FunctionName("Alexa")]


   public static async Task<IActionResult> Run(


   [HttpTrigger(AuthorizationLevel.Function, "post", Route = null)] HttpRequest req,


   ILogger log)


   {


   string json = await req.ReadAsStringAsync();


   var skillRequest = JsonConvert.DeserializeObject<SkillRequest>(json);


   //this is the language used to invoke the skill


   string language = skillRequest.Request.Locale;


   }
Now we can use this information to start building conditions and to make sure that the various intents return the most appropriate message, like this:
   [FunctionName("Alexa")]


   public static async Task<IActionResult> Run(


   [HttpTrigger(AuthorizationLevel.Function, "post", Route = null)] HttpRequest req,


   ILogger log)


   {


   string json = await req.ReadAsStringAsync();


   var skillRequest = JsonConvert.DeserializeObject<SkillRequest>(json);


   //this is the language used to invoke the skill


   string language = skillRequest.Request.Locale;


   var requestType = skillRequest.GetRequestType();


   SkillResponse response = null;


   if (requestType == typeof(LaunchRequest))


   {


   if (language == "it-IT")


   {


   response = ResponseBuilder.Tell("Benvenuto in AppConsult!");


   }


   else


   {


   response = ResponseBuilder.Tell("Welcome to AppConsult!");


   }


   response.Response.ShouldEndSession = false;


   }


   return new OkObjectResult(response);


   }
However, as you can see this approach can lead the code hard to read and a bit "clumsy". Imagine, in fact, that you have a more complex skill, which is capable of handling dozens of intents instead of just one and which supports more than 2 languages. The amount of if statements you have to write can be a bit overwhelming.
Thanks to an extension library for Alexa.NET it's possible to make the multi language support a little bit smarter. The library is called Alexa.NET.LocaleSpeech , it's available on GitHub and also as NuGet package .
First, let's install it in our Azure Function, by searching for it in the NuGet Package Manager.
Now let's write a helper method to setup the localization:
   public static ILocaleSpeech SetupLanguages(SkillRequest skillRequest)


   {


   var store = new DictionaryLocaleSpeechStore();


   store.AddLanguage("en", new Dictionary<string, object>


   {


   { "Welcome", "Welcome to the AppConsult skill!" }


   });


   store.AddLanguage("it", new Dictionary<string, object>


   {


   { "Welcome", "Benvenuti in Windows AppConsult!" }


   });


   var localeSpeechFactory = new LocaleSpeechFactory(store);


   var locale = localeSpeechFactory.Create(skillRequest);


   return locale;


   }
The method accepts as input the SkillRequest , which will be used to determine the current locale.
As first, we setup a new DictionaryLocaleSpeechStore , which works in a similar way as a resource file. It exposes a method called AddLanguage() , which accepts as input the culture code of the language and the list of messages. The second parameter is a Dictionary<string, object> , which means that every object is identified by a key (a unique identifier) and a value (the text of the message). Ideally, each language will contain the same list of keys, but with different values, since each text will be translated to the specific language.
The previous sample creates two dictionaries, one for Italian and one for English, with the text for the welcome message of the skill, which is identified by the Welcome key.
In the end, we create a LocaleSpeechFactory with the store we have just generated and we use it to return an ILocaleSpeech object. This is the object we're going to use to automatically retrieve the various messages in the correct language.
Let's see how we can change the if / else code we have previously written to use this new and better approach:
   [FunctionName("Alexa")]


   public static async Task<IActionResult> Run(


   [HttpTrigger(AuthorizationLevel.Function, "post", Route = null)] HttpRequest req,


   ILogger log)


   {


   string json = await req.ReadAsStringAsync();


   var skillRequest = JsonConvert.DeserializeObject<SkillRequest>(json);


   //this is the language used to invoke the skill


   string language = skillRequest.Request.Locale;


   var requestType = skillRequest.GetRequestType();


   var locale = SetupLanguages(skillRequest);


   SkillResponse response = null;


   if (requestType == typeof(LaunchRequest))


   {


   var message = await locale.Get("Welcome", null);


   response = ResponseBuilder.Tell(message);


   response.Response.ShouldEndSession = false;


   }


   return new OkObjectResult(response);


   }
As you can see, the code is now much cleaner and easier to read. We can just call the asynchronous method Get() exposed by the ILocaleSpeech object we have just created, passing as parameter the key of the message, which is Welcome in this case. Automatically, the object will return us the proper message, based on the locale specified in the request sent by Alexa.
As you have noticed, we have passed a second null parameter to the Get() method. This is because the message we had to return was a simple one: it doesn't contain any parameter.
If, instead, we need to compose a more complex message with some dynamic element, we can pass them as a collection of strings in the second parameter. Let's see an example by adapting the custom intent handled by our skill (the one identified by the LastPosts keyword) to use this multi language approach.
First, let's add a new resource in our language dictionary:
   public static ILocaleSpeech SetupLanguages(SkillRequest skillRequest)


   {


   var store = new DictionaryLocaleSpeechStore();


   store.AddLanguage("en", new Dictionary<string, object>


   {


   { "Welcome", "Welcome to the AppConsult skill!" },


   { "LastPosts", "The title of the last article is {0}" }


   });


   store.AddLanguage("it", new Dictionary<string, object>


   {


   { "Welcome", "Benvenuti in Windows AppConsult!" },


   { "LastPosts", "Il titolo dell'ultimo articolo è {0}" }


   });


   var localeSpeechFactory = new LocaleSpeechFactory(store);


   var locale = localeSpeechFactory.Create(skillRequest);


   return locale;


   }
As you can see, this new entry (identified by the key LastPosts ) has a placeholder for the position where we need to embed a dynamic content, which is the title of the article. This is the same syntax used by the string.Format() method. If you need to support more than one dynamic content, you can just add other placeholders in an incremental way ({1}, {2}, etc.).
Now we can just call the Get() method of the ILocaleSpeech object passing, as second parameter, an array with the list of parameters:
   [FunctionName("Alexa")]


   public static async Task<IActionResult> Run(


   [HttpTrigger(AuthorizationLevel.Function, "post", Route = null)] HttpRequest req,


   ILogger log)


   {


   string json = await req.ReadAsStringAsync();


   var skillRequest = JsonConvert.DeserializeObject<SkillRequest>(json);


   //this is the language used to invoke the skill


   string language = skillRequest.Request.Locale;


   var requestType = skillRequest.GetRequestType();


   var locale = SetupLanguages(skillRequest);


   SkillResponse response = null;


   if (requestType == typeof(IntentRequest))


   {


   var intentRequest = skillRequest.Request as IntentRequest;


   if (intentRequest.Intent.Name == "LastPosts")


   {


   string rss = "https://blogs.msdn.microsoft.com/appconsult/feed/";


   string output = string.Empty;


   List<string> news = await ParseFeed(rss);


   var message = await locale.Get("LastPosts", new string[] { news.FirstOrDefault() });


   response = ResponseBuilder.Tell(message);


   }


   return new OkObjectResult(response);


   }
In this case, the array contains just one string, which is the title of the last published news retrieved from the RSS feed of this blog. In case the message includes more placeholders, you just have to add inside the array.
Testing the skill
To test the skill you can continue to use the Alexa Simulator we have learned to use so far. In the top left corner you will have a drop down to switch from one language to another. Other than that, there are no differences. You can just type commands in your new language and check if they are properly handled:
Wrapping up
In this post we have seen how you can extend the reach of your Alexa skill, by adding support for multiple languages. Unfortunately, being just a function invoked by a HTTP request coming from Alexa, we don't have a smart way to handle multiple locales like we can do with resources in a Windows application. However, thanks to an extension library for Alexa.NET, we can still optimize the code and make it cleaner and easier to read and maintain.
Remember that every update to the interaction model, including adding a new language, requires a new verification from Amazon. As such, after you have tested that everything is working also in the new languages you've added, you will need to submit your skill for a new certification. The "live" model and the "development" model will be kept separated so, during the development or the review process, the original model will continue to be available to users who are using the public version of the skill. As such, make sure that your Azure Function doesn't contain any change that could break the compatibility with the previous model, at least until the updated version is validated and certified.
You can download the updated sample code from GitHub .
Happy coding!
0
Likes
You must be a registered user to add a comment. If you've already registered, sign in. Otherwise, register and sign in.
Labels