Turn on suggestions
Auto-suggest helps you quickly narrow down your search results by suggesting possible matches as you type.
- Home
- Microsoft 365
- Modern Work App Consult Blog
- Introduction to Docker - Create a multi-container application
Introduction to Docker - Create a multi-container application
- Subscribe to RSS Feed
- Mark as New
- Mark as Read
- Bookmark
- Subscribe
- Printer Friendly Page
- Report Inappropriate Content
Published
Jan 15 2019 03:01 PM
872
Views
Jan 15 2019
03:01 PM
Jan 15 2019
03:01 PM
First published on MSDN on Sep 11, 2018
In the previous post we did something a little bit more complex compared to the experiments we did in the first post . We took a real web application (even if it was just the standard ASP.NET Core template) and we created an image based on it, so that we could run it inside a containerized environment. However, it was a really simple scenario. In the real world, applications are made by multiple components: a frontend, a backend, a database, etc. If you remember what we have learned in the first post , a container is a single unit of work. Each unit should live inside a different container, which need to communicate together.
In this post we're going to explore exactly how to do this.
We're going to start from the sample we have built in the previous post and we're going to enhance it, by displaying the list of posts published on this blog. However, to make things more interesting, we aren't going to add the code to retrieve the news directly in the web application, but we're going to implement the logic in a Web API project. The website will then connect to this REST API to populate the list and display it in the main page.
Let's start to create our Web API. We're going to use again Visual Studio Code and the .NET Core CLI. Create a new empty folder on your machine, then open it with Visual Studio Code. Open the terminal by choosing Terminal -> New Terminal and then run the following command:
Your folder will be filled up with a new template, this time to create a Web API and not a full website. You can notice this because there won't be any Pages folder and you won't find any HTML / CSS / JavaScript file.
You will find only a default endpoint implemented in the ValuesController class under Controllers . By default, this API will be exposed using the endpoint /api/values .
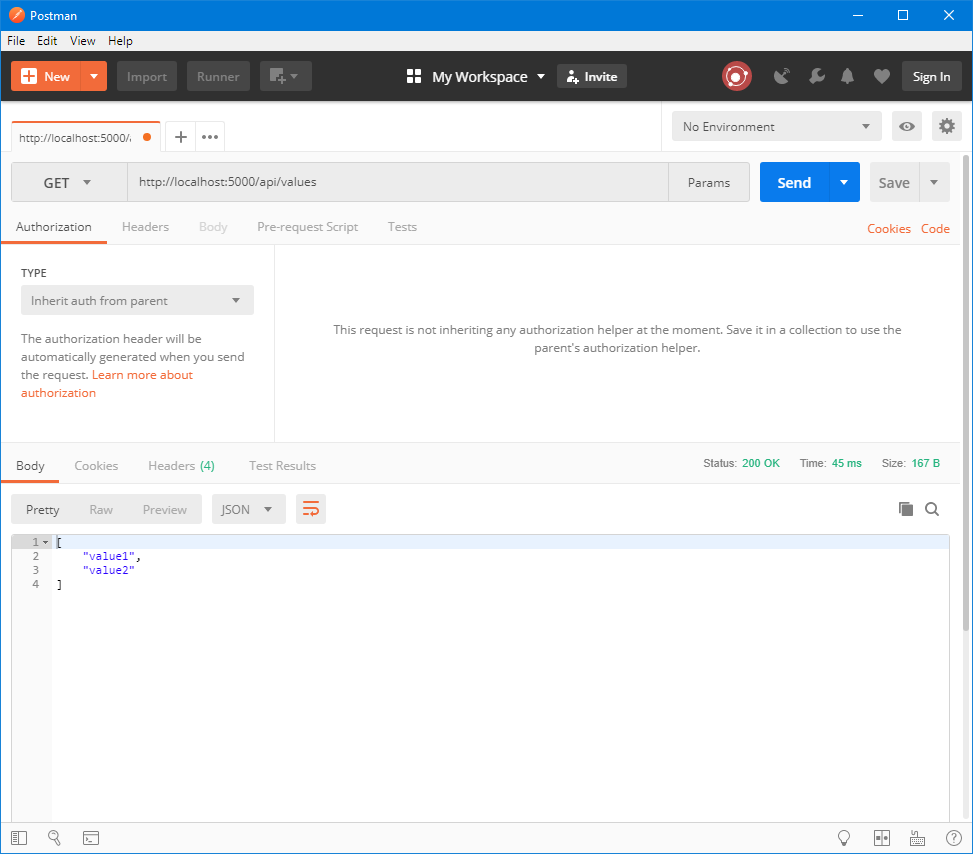
If you want to give it a try, you can use the dotnet run command or launch the integrated Visual Studio Code debugger. Once the web server has started, you can hit the endpoint http://localhost:5000/api/values with your browser, or even better, with an utility like Postman (one of the best tools for API developers) to see the response:
If you hit any error with Postman, it's because the default .NET Core template enables HTTPS, which can create problems in case you don't have a valid certificate. As a workaround, since we're just building a sample, you can disable HTTPS by commenting line 43 in the Startup.cs file:
Now that we have the basic template working, let's make something more meaningful. Let's add a new controller to our project, by adding inside the Controller folder a new class called NewsController.cs . Thanks to the naming convention, this class will handle the endpoint /api/news .
Copy the content of the ValuesController class into the new file and change the name of the class to NewsController . Remove also all the declared methods, except the Get() one. This is how your class should look like:
The Get() method is decorated with the [HttpGet] attribute, which means that it's invoked when you perform a HTTP GET against the endpoint. This is the behavior we have observed with the previous test: it has been enough to hit the /api/values endpoint with the browser to see, as output, the JSON returned by the method.
Let's remove the sample data and return some real one. We're going to download the RSS feed of this blog and return the titles of all the posts as a JSON array.
To make our job easier, we're going to use a NuGet package called Microsoft.SyndicationFeed.ReadWriter , which offers a set of APIs to manipulate a RSS feed.
To add it, let's go back to the terminal and type the following command:
The tool will download the package and add the following reference inside the .csproj file:
Now replace the content of the Get() function with the following code:
At first you will get some compilation errors. You will need to declare, at the top of the class, the following namespaces:
Notice that you need to change also the signature of the Get() function. Instead of returning ActionResult<IEnumerable> , it must return now a Task<ActionResult<IEnumerable>> . Additionally, the method has been marked with the async keyword. These changes are required because, inside the methods, we're using some asynchronus APIs, which must be invoked with the await prefix.
The body of the function is pretty easy to decode. First, by using the HttpClient class, we download the RSS feed as a string. Then, using the XmlReader and the RssFeedReader classes, we iterate through the whole XML by calling the Read() method. Every time we find a new item (we check the ElementType property on the current element), we read its content using the ReadItem() method and we store it in a list. At the end of the process, we return the list, which will contain all the titles of the various posts.
If you want to test that you have done everything properly, just type in the command prompt dotnet run again and point Postman (or your browser) to the new endpoint, which will be http://localhost:5000/api/news .
You should see something like this:

Now that you have tested that everything is working, we need to put our Web API inside a container. If you have followed the previous post, the procedure is exactly the same. We need to create a Dockerfile in the project's folder and define the steps to build the image. Since, in terms of execution, there are no differences between a Web API and a web application in .NET Core, we can just reuse the same Dockerfile. We just need to change the name of the DLL in the ENTRYPOINT to match the output of our new project:
Once the image has been created, you can test it as usual by creating a container with the docker run command:
We're running a container based on the image we have just created and we are exposing the internal 80 port to the 1983 port on the host machine. This means that, to test if the Web API is properly running inside the container, we need to hit the endpoint http://localhost:1983/api/news . If we did everything properly, we should see the same output as before:

Now we need to change the web application we have built in the previous post to retrieve and display the list of posts from the Web API we have just developed.
From a high level point of view, this means:
Let's pause one second to think about the implementation. If we picture the logical flow we need to implement, we immediately understand that we will hit a blocker right in the first step. In order to perform a HTTP request, we need to know the address of the endpoint. However, when the application is running inside a container, it doesn't have access to the host. If we run both containers (the web app and the Web API) and we try from the web app to connect to the REST API using an endpoint like http://localhost:1983/api/news , it just wouldn't work. Localhost, in the context of the container, means the container itself, but the Web API isn't running in the same one of the web app. It's running in a separate container.
How we can put the container in communication? Thanks to a network bridge. When we run a container it isn't directly connected to the network adapter of the host machine, but to a bridge. Multiple containers can be connected to the same bridge. You can think of them like different computers connected to the same network: they will all receive a dedicated IP address, but they will be part of the same subnet, so they can communicate together.
By default, when you install Docker, it will automatically create a bridge for you. You can see it by running the docker network ls command:
The default bridge is called bridge and, by default, when you perform the docker run command, the container is attached to it.
As you have probably understood, there isn't any magic or a special feature to connect multiple containers together, but it's enough a basic networking knowledge.
Since the containers are part of the same network, they can communicate together using their IP address.
But how we can find the IP address of the container? Thanks to a command called docker inspect , which allows us to inspect the configuration of an image or a running container.
To use it, first we need to have our container up & running. As such, make sure that the container which hosts our Web API has started. Then run the docker ps command and take note of the identifier:
Then run the docker inspect command followed by the id, like:
The command will ouput a long JSON file with all the properties and settings of the container. Look for a property called Networks , which will look like this:
As you can see, one of the properties is IPAddress and it contains the IP address assigned to the container. This is the endpoint we need to hit to communicate with the Web API.
Now that we know how to call the Web API, we can change our web application. We'll start from the same web project we have built in the previous post, so open the folder which contains it in a new instance of Visual Studio Code.
We're going to display the list of posts in the index, so open the Index.cshtml.cs file inside the Pages folder.
First, let's add a property to store the list of posts. We're going to iterate it in the HTML to display them to the user:
Then we need to remove the OnGet() method and replace with an asynchronous version. This is the method that it's executed when the page is requested by the browser.
By using the HttpClient class we perform a HTTP GET against the endpoint exposed by the other container and then, using JSON.NET, we deserialize the resulting JSON into a list of strings.
Thanks to Razor it's really easy to display the content of the NewsFeed list in the HTML page. Open the Index.cshtml file and look for the following snippet:
The 4 divs represents the 4 bokes that you can see in the center of the page. We're going to take one of them (in my case, the second one) and replace the current content with the following snippet:
Using a foreach statement we're iterating over all the items inside the NewsFeed property we have populated in the code. For each item, we print its value prefixed by a bullet point.
That's all. Now we'ready to test our work. First we need to update the image of our web application, so that we can include the changes we've made to retrieve the list of news from the Web API. If you're using Visual Studio Code, simply right click on the Dckerfile and choose Build image ; alternatively, open the terminal on the project's folder and run the following command:
Now let's run a container based on it with the usual docker run command:
Now, if you run the docker ps command, you should see two contaners up & running: the web app and the Web API.
Now open the browser and hit the URL http://localhost:8080 . If you have done evertyhing in the right way, you should see this:

As you can notice, the second column (called How To) is now displaying the list of posts published on this blog, retrieved from the Web API. Yay! Our web application (running in a container) is succesfully communicating with our Web API (running in another container).
Using the IP address of the machine isn't a completely reliable way to perform the communication. The container, in fact, could get a different IP machine if it's deployed on a different bridge, which may live on a different subnet.
Woudln't it be better to have a DNS and actually connect to the containers using their name?
Good news, you can! And this option is enabled by default, since automatically the bridge DNS gets an entry for each container, using the name which has been assigned by Docker. However, the bad news is that the default Docker bridge doesn't support this feature. The default bridge, in fact, is great for testing, but it isn't meant for production scenarios.
You'll need to create your own network bridge to achieve this goal. Doing it is really easy. Just use the docker network command, followed by the name you want to assign to the bridge:
Now we need to configure the container to use this new bridge instead of the default one. We can do it by using docker run and the --network parameter. Let's use it to run both containers from scratch. First, remember to stop them in case they're still running with the docker stop command, followed by the id of the container that you can retrieve with docker ps .
With the --network parameter we have specified the name of the bridge we have just created. We are using also the --name parameter to assign a specific name to the container, so that Docker doesn't generate anymore a random one. As you can notice, we haven't exposed the port of the WebAPI to the host. We don't need it anymore, since the Web API must be accessed only by the web app running in the other container, not by the host machine.
If you perform the docker ps command now, you should now notice that the NAMES column contains the names you have just assigned:
That's it. Now the two containers are connected to a new network which supports DNS resolving. This means that the web application can connect to the container which hosts the Web API using the newsfeed name instead of the IP address.
Let's test this! Open again the Index.cshtml.cs file in the website project and change the address of the REST API to http://newsfeed/api/news :
Now build the image again (as usual, with Visual Studio Code or the docker build command) and, in the end, run again the container. Remember to add the --name and the --network parameters:
If you open your browser against the URL http://localhost:8080 everything should work as expected. You should see again the default ASP.NET template with, in the second box, the list of news coming from the Web API.
In this post we have started to see how Docker is a great solution to split up our solution in different services, which all live in a separate environment. This helps to scale better and to be more agile, since we can update one of the services being sure that the other ones won't be affected, since they live in an isolated environment.
In the next post we're going to add a third container to the puzzle. However, this time, instead of building our own image, we're going to use an already existing one available on Docker Hub. We're going to see also we can define a multi-container application using a tool called Docker Compose, so that we can deploy it in one single step, instead of having to manually start each container.
In the meantime, you can play with the samples described in this project, which are available on GitHub .
Happy coding!
In the previous post we did something a little bit more complex compared to the experiments we did in the first post . We took a real web application (even if it was just the standard ASP.NET Core template) and we created an image based on it, so that we could run it inside a containerized environment. However, it was a really simple scenario. In the real world, applications are made by multiple components: a frontend, a backend, a database, etc. If you remember what we have learned in the first post , a container is a single unit of work. Each unit should live inside a different container, which need to communicate together.
In this post we're going to explore exactly how to do this.
Creating a Web API
We're going to start from the sample we have built in the previous post and we're going to enhance it, by displaying the list of posts published on this blog. However, to make things more interesting, we aren't going to add the code to retrieve the news directly in the web application, but we're going to implement the logic in a Web API project. The website will then connect to this REST API to populate the list and display it in the main page.
Let's start to create our Web API. We're going to use again Visual Studio Code and the .NET Core CLI. Create a new empty folder on your machine, then open it with Visual Studio Code. Open the terminal by choosing Terminal -> New Terminal and then run the following command:
dotnet new webapi
Your folder will be filled up with a new template, this time to create a Web API and not a full website. You can notice this because there won't be any Pages folder and you won't find any HTML / CSS / JavaScript file.
You will find only a default endpoint implemented in the ValuesController class under Controllers . By default, this API will be exposed using the endpoint /api/values .
If you want to give it a try, you can use the dotnet run command or launch the integrated Visual Studio Code debugger. Once the web server has started, you can hit the endpoint http://localhost:5000/api/values with your browser, or even better, with an utility like Postman (one of the best tools for API developers) to see the response:
If you hit any error with Postman, it's because the default .NET Core template enables HTTPS, which can create problems in case you don't have a valid certificate. As a workaround, since we're just building a sample, you can disable HTTPS by commenting line 43 in the Startup.cs file:
   public void Configure(IApplicationBuilder app, IHostingEnvironment env)


   {


   if (env.IsDevelopment())


   {


   app.UseDeveloperExceptionPage();


   }


   else


   {


   app.UseHsts();


   }


   // app.UseHttpsRedirection();


   app.UseMvc();


   }
Now that we have the basic template working, let's make something more meaningful. Let's add a new controller to our project, by adding inside the Controller folder a new class called NewsController.cs . Thanks to the naming convention, this class will handle the endpoint /api/news .
Copy the content of the ValuesController class into the new file and change the name of the class to NewsController . Remove also all the declared methods, except the Get() one. This is how your class should look like:
   using System;


   using System.Collections.Generic;


   using System.Linq;


   using System.Threading.Tasks;


   using Microsoft.AspNetCore.Mvc;


   namespace TestWebApi.Controllers


   {


   [Route("api/[controller]")]


   [ApiController]


   public class NewsController : ControllerBase


   {


   // GET api/values


   [HttpGet]


   public ActionResult<IEnumerable<string>> Get()


   {


   return new string[] { "value1", "value2" };


   }


   }


   }
The Get() method is decorated with the [HttpGet] attribute, which means that it's invoked when you perform a HTTP GET against the endpoint. This is the behavior we have observed with the previous test: it has been enough to hit the /api/values endpoint with the browser to see, as output, the JSON returned by the method.
Let's remove the sample data and return some real one. We're going to download the RSS feed of this blog and return the titles of all the posts as a JSON array.
To make our job easier, we're going to use a NuGet package called Microsoft.SyndicationFeed.ReadWriter , which offers a set of APIs to manipulate a RSS feed.
To add it, let's go back to the terminal and type the following command:
dotnet add package Microsoft.SyndicationFeed.ReaderWriter
The tool will download the package and add the following reference inside the .csproj file:
<PackageReference Include="Microsoft.SyndicationFeed.ReaderWriter" Version="1.0.2" />
Now replace the content of the Get() function with the following code:
   [HttpGet]


   public async Task<ActionResult<IEnumerable<string>>> Get()


   {


   HttpClient client = new HttpClient();


   string rss = await client.GetStringAsync("https://blogs.msdn.microsoft.com/appconsult/feed/");


   List<string> news = new List<string>();


   using (var xmlReader = XmlReader.Create(new StringReader(rss), new XmlReaderSettings { Async = true }))


   {


   RssFeedReader feedReader = new RssFeedReader(xmlReader);


   while (await feedReader.Read())


   {


   if (feedReader.ElementType == Microsoft.SyndicationFeed.SyndicationElementType.Item)


   {


   var item = await feedReader.ReadItem();


   news.Add(item.Title);


   }


   }


   }


   return news;


   }
At first you will get some compilation errors. You will need to declare, at the top of the class, the following namespaces:
   using System;


   using System.Collections.Generic;


   using System.IO;


   using System.Linq;


   using System.Net.Http;


   using System.Threading.Tasks;


   using System.Xml;


   using Microsoft.AspNetCore.Mvc;


   using Microsoft.SyndicationFeed.Rss;
Notice that you need to change also the signature of the Get() function. Instead of returning ActionResult<IEnumerable> , it must return now a Task<ActionResult<IEnumerable>> . Additionally, the method has been marked with the async keyword. These changes are required because, inside the methods, we're using some asynchronus APIs, which must be invoked with the await prefix.
The body of the function is pretty easy to decode. First, by using the HttpClient class, we download the RSS feed as a string. Then, using the XmlReader and the RssFeedReader classes, we iterate through the whole XML by calling the Read() method. Every time we find a new item (we check the ElementType property on the current element), we read its content using the ReadItem() method and we store it in a list. At the end of the process, we return the list, which will contain all the titles of the various posts.
If you want to test that you have done everything properly, just type in the command prompt dotnet run again and point Postman (or your browser) to the new endpoint, which will be http://localhost:5000/api/news .
You should see something like this:
Now that you have tested that everything is working, we need to put our Web API inside a container. If you have followed the previous post, the procedure is exactly the same. We need to create a Dockerfile in the project's folder and define the steps to build the image. Since, in terms of execution, there are no differences between a Web API and a web application in .NET Core, we can just reuse the same Dockerfile. We just need to change the name of the DLL in the ENTRYPOINT to match the output of our new project:
   FROM microsoft/dotnet:2.1-sdk AS build-env


   WORKDIR /app


   EXPOSE 80


   # Copy csproj and restore as distinct layers


   COPY *.csproj ./


   RUN dotnet restore


   # Copy everything else and build


   COPY . ./


   RUN dotnet publish -c Release -o out


   # Build runtime image


   FROM microsoft/dotnet:2.1-aspnetcore-runtime


   WORKDIR /app


   COPY --from=build-env /app/out .


   ENTRYPOINT ["dotnet", "TestWebApi.dll"]
Once the image has been created, you can test it as usual by creating a container with the docker run command:
docker run --rm -p 1983:80 -d qmatteoq/webapitest
We're running a container based on the image we have just created and we are exposing the internal 80 port to the 1983 port on the host machine. This means that, to test if the Web API is properly running inside the container, we need to hit the endpoint http://localhost:1983/api/news . If we did everything properly, we should see the same output as before:
Putting the two containers in communication
Now we need to change the web application we have built in the previous post to retrieve and display the list of posts from the Web API we have just developed.
From a high level point of view, this means:
- Performing a HTTP GET request to the Web API
- Getting the JSON response
- Parsing it and displaying it into the HTML page
Let's pause one second to think about the implementation. If we picture the logical flow we need to implement, we immediately understand that we will hit a blocker right in the first step. In order to perform a HTTP request, we need to know the address of the endpoint. However, when the application is running inside a container, it doesn't have access to the host. If we run both containers (the web app and the Web API) and we try from the web app to connect to the REST API using an endpoint like http://localhost:1983/api/news , it just wouldn't work. Localhost, in the context of the container, means the container itself, but the Web API isn't running in the same one of the web app. It's running in a separate container.
How we can put the container in communication? Thanks to a network bridge. When we run a container it isn't directly connected to the network adapter of the host machine, but to a bridge. Multiple containers can be connected to the same bridge. You can think of them like different computers connected to the same network: they will all receive a dedicated IP address, but they will be part of the same subnet, so they can communicate together.
By default, when you install Docker, it will automatically create a bridge for you. You can see it by running the docker network ls command:
   PS C:\Users\mpagani\Source\Samples\NetCoreApi\TestWebApi> docker network ls


   NETWORK ID          NAME                DRIVER              SCOPE


   90b5b4a5e610        bridge              bridge              local


   a29b7408ba22        none                null                local
The default bridge is called bridge and, by default, when you perform the docker run command, the container is attached to it.
As you have probably understood, there isn't any magic or a special feature to connect multiple containers together, but it's enough a basic networking knowledge.
Since the containers are part of the same network, they can communicate together using their IP address.
But how we can find the IP address of the container? Thanks to a command called docker inspect , which allows us to inspect the configuration of an image or a running container.
To use it, first we need to have our container up & running. As such, make sure that the container which hosts our Web API has started. Then run the docker ps command and take note of the identifier:
   PS C:\Users\mpagani\Source\Samples\NetCoreApi\TestWebApi> docker ps


   CONTAINER ID        IMAGE                 COMMAND                  CREATED             STATUS              PORTS                  NAMES


   76bf6433f4c2        qmatteoq/webapitest   "dotnet TestWebApi.d…"   39 minutes ago      Up 39 minutes       0.0.0.0:1983->80/tcp   jolly_leavitt
Then run the docker inspect command followed by the id, like:
docker inspect 76bf6433f4c2
The command will ouput a long JSON file with all the properties and settings of the container. Look for a property called Networks , which will look like this:
   "Networks": {


   bridge": {


   "IPAMConfig": null,


   "Links": null,


   "Aliases": null,


   "NetworkID": "90b5b4a5e610560eb300174ad426296926fd0d5a94221ed53e200d956af7128f",


   "EndpointID": "359b9aa74ac9408abd9ca88b652c8c6e3d7e0ea6e1d688250aadce3aabaf8e24",


   "Gateway": "172.17.0.1",


   "IPAddress": "172.17.0.2",


   "IPPrefixLen": 16,


   "IPv6Gateway": "",


   "GlobalIPv6Address": "",


   "GlobalIPv6PrefixLen": 0,


   "MacAddress": "02:42:ac:11:00:02",


   "DriverOpts": null


   }


   }
As you can see, one of the properties is IPAddress and it contains the IP address assigned to the container. This is the endpoint we need to hit to communicate with the Web API.
Updating the web application
Now that we know how to call the Web API, we can change our web application. We'll start from the same web project we have built in the previous post, so open the folder which contains it in a new instance of Visual Studio Code.
We're going to display the list of posts in the index, so open the Index.cshtml.cs file inside the Pages folder.
First, let's add a property to store the list of posts. We're going to iterate it in the HTML to display them to the user:
public List<string> NewsFeed { get; set; }
Then we need to remove the OnGet() method and replace with an asynchronous version. This is the method that it's executed when the page is requested by the browser.
   public async Task OnGetAsync()


   {


   HttpClient client = new HttpClient();


   string json = await client.GetStringAsync("http://172.17.0.2/api/news");


   NewsFeed = JsonConvert.DeserializeObject<List<string>>(json);


   }
By using the HttpClient class we perform a HTTP GET against the endpoint exposed by the other container and then, using JSON.NET, we deserialize the resulting JSON into a list of strings.
Thanks to Razor it's really easy to display the content of the NewsFeed list in the HTML page. Open the Index.cshtml file and look for the following snippet:
   <div class="row">


   <div class="col-md-3">


   ...


   </div>


   <div class="col-md-3">


   ...


   </div>


   <div class="col-md-3">


   ...


   </div>


   <div class="col-md-3">


   ...


   </div>


   </div>
The 4 divs represents the 4 bokes that you can see in the center of the page. We're going to take one of them (in my case, the second one) and replace the current content with the following snippet:
   <div class="col-md-3">


   <h2>How to</h2>


   <ul>


   @foreach (string news in Model.NewsFeed)


   {


   <li>@news</li>


   }


   </ul>


   </div>
Using a foreach statement we're iterating over all the items inside the NewsFeed property we have populated in the code. For each item, we print its value prefixed by a bullet point.
Testing our work
That's all. Now we'ready to test our work. First we need to update the image of our web application, so that we can include the changes we've made to retrieve the list of news from the Web API. If you're using Visual Studio Code, simply right click on the Dckerfile and choose Build image ; alternatively, open the terminal on the project's folder and run the following command:
docker build --rm -t qmatteoq/testwebapp:latest .
Now let's run a container based on it with the usual docker run command:
docker run -p 8080:80 --rm -d qmatteoq/testwebapp
Now, if you run the docker ps command, you should see two contaners up & running: the web app and the Web API.
   PS C:\Users\mpagani\Source\Samples\NetCoreApi\TestWebApp> docker ps


   CONTAINER ID        IMAGE                 COMMAND                  CREATED             STATUS              PORTS                  NAMES


   9e08f5339432        qmatteoq/testwebapp   "dotnet TestWebApp.d…"   5 seconds ago       Up 2 seconds        0.0.0.0:8080->80/tcp   agitated_bardeen


   76bf6433f4c2        qmatteoq/webapitest   "dotnet TestWebApi.d…"   About an hour ago   Up About an hour    0.0.0.0:1983->80/tcp   jolly_leavitt
Now open the browser and hit the URL http://localhost:8080 . If you have done evertyhing in the right way, you should see this:
As you can notice, the second column (called How To) is now displaying the list of posts published on this blog, retrieved from the Web API. Yay! Our web application (running in a container) is succesfully communicating with our Web API (running in another container).
Is there a way to improve the communication?
Using the IP address of the machine isn't a completely reliable way to perform the communication. The container, in fact, could get a different IP machine if it's deployed on a different bridge, which may live on a different subnet.
Woudln't it be better to have a DNS and actually connect to the containers using their name?
Good news, you can! And this option is enabled by default, since automatically the bridge DNS gets an entry for each container, using the name which has been assigned by Docker. However, the bad news is that the default Docker bridge doesn't support this feature. The default bridge, in fact, is great for testing, but it isn't meant for production scenarios.
You'll need to create your own network bridge to achieve this goal. Doing it is really easy. Just use the docker network command, followed by the name you want to assign to the bridge:
docker network create my-net
Now we need to configure the container to use this new bridge instead of the default one. We can do it by using docker run and the --network parameter. Let's use it to run both containers from scratch. First, remember to stop them in case they're still running with the docker stop command, followed by the id of the container that you can retrieve with docker ps .
   docker run -p 8080:80 --name webapp --network my-net --rm -d qmatteoq /testwebapp


   docker run --name newsfeed --network my-net --rm -d qmatteoq/webapitest
With the --network parameter we have specified the name of the bridge we have just created. We are using also the --name parameter to assign a specific name to the container, so that Docker doesn't generate anymore a random one. As you can notice, we haven't exposed the port of the WebAPI to the host. We don't need it anymore, since the Web API must be accessed only by the web app running in the other container, not by the host machine.
If you perform the docker ps command now, you should now notice that the NAMES column contains the names you have just assigned:
   PS C:\Users\mpagani\Source\Samples\NetCoreApi\TestWebApp> docker ps


   CONTAINER ID        IMAGE                 COMMAND                  CREATED             STATUS              PORTS                  NAMES


   922a8f1cbd39        qmatteoq/webapitest   "dotnet TestWebApi.d…"   4 minutes ago       Up 4 minutes                            newsfeed


   95717ee175bd        qmatteoq/testwebapp   "dotnet TestWebApp.d…"   4 minutes ago       Up 4 minutes        0.0.0.0:8080->80/tcp   webapp
That's it. Now the two containers are connected to a new network which supports DNS resolving. This means that the web application can connect to the container which hosts the Web API using the newsfeed name instead of the IP address.
Let's test this! Open again the Index.cshtml.cs file in the website project and change the address of the REST API to http://newsfeed/api/news :
   public async Task OnGetAsync()


   {


   HttpClient client = new HttpClient();


   string json = await client.GetStringAsync("http://newsfeed/api/news");


   NewsFeed = JsonConvert.DeserializeObject<List<string>>(json);


   }
Now build the image again (as usual, with Visual Studio Code or the docker build command) and, in the end, run again the container. Remember to add the --name and the --network parameters:
docker run -p 8080:80 --name webapp --network my-net --rm -d qmatteoq /testwebapp
If you open your browser against the URL http://localhost:8080 everything should work as expected. You should see again the default ASP.NET template with, in the second box, the list of news coming from the Web API.
Wrapping up
In this post we have started to see how Docker is a great solution to split up our solution in different services, which all live in a separate environment. This helps to scale better and to be more agile, since we can update one of the services being sure that the other ones won't be affected, since they live in an isolated environment.
In the next post we're going to add a third container to the puzzle. However, this time, instead of building our own image, we're going to use an already existing one available on Docker Hub. We're going to see also we can define a multi-container application using a tool called Docker Compose, so that we can deploy it in one single step, instead of having to manually start each container.
In the meantime, you can play with the samples described in this project, which are available on GitHub .
Happy coding!
You must be a registered user to add a comment. If you've already registered, sign in. Otherwise, register and sign in.
Labels