- Home
- Security, Compliance, and Identity
- Core Infrastructure and Security Blog
- Deploying Upgrade Readiness without SCCM
- Subscribe to RSS Feed
- Mark as New
- Mark as Read
- Bookmark
- Subscribe
- Printer Friendly Page
- Report Inappropriate Content
First published on TechNet on Jul 02, 2018
Hello everyone! My name is Paul Fitzgerald and I'm a Platforms PFE. I love learning new things and sharing what I have learned with others. My role as a PFE allows me the opportunity to do just that, and I'll now have the pleasure of sharing with you all as well! I've been working a lot with my customers lately on Windows 10 adoption. One thing that has helped tremendously in providing valuable insight into their environments is Windows Analytics Upgrade Readiness . So today, I thought we'd take a look at deploying Upgrade Readiness to help you migrate from legacy Windows operating systems to Windows 10 and to help you stay current with Windows 10 feature updates. Many customers use System Center Configuration Manager to deploy Upgrade Readiness to their environment. But what if you don't have SCCM? That's what we'll focus on today – deploying Upgrade Readiness without SCCM. More specifically, we're going to go over an approach that utilizes Group Policy Preferences and Scheduled Tasks to perform the initial configuration and periodic script execution. Let's get started, shall we?
Let's review Upgrade Readiness
Upgrade Readiness is a free solution built on Azure Operations Management Suite (OMS). It provides great insight into your client environment to help you plan and manage your Windows 10 upgrade process. It not only helps you move from Windows 7 and Windows 8.1 to Windows 10, but also helps you align with the Windows as a Service model and keep current with Windows 10 features updates. Upgrade Readiness accomplishes this by analyzing your organization's telemetry data and providing you with a workflow that guides you through the entire process, a detailed computer and application inventory, incredible insights into application and driver compatibility, and more. You can read more about Upgrade Readiness here . What if you don't have Azure? No worries, it's simple to setup and everything we're talking about today is free! When configured correctly, all data associated with the Upgrade Readiness solution is exempt from billing in both OMS and Azure. Upgrade Readiness data does not count toward OMS daily upload limits. Have a look at the Getting Started with Upgrade Readiness article for more details.
Getting started is easy
We recommend you start with a small pilot to ensure everything is in working order and you've met all the prerequisites. Sometimes it takes a bit of time to get approval to enable telemetry and to get firewalls and/or proxy servers configured, so be sure to read through the information on telemetry and connectivity . Once you've successfully completed your pilot, you're ready to deploy at scale . There are essentially three options for to accomplish that goal:
- Configure settings via Group Policy (Active Directory)
- Configure settings via Mobile Device Management (Intune)
- Deploy the Upgrade Readiness deployment script
With the first two options, you may have to wait a long time (possibly weeks) before you see data about your devices. We recommend using the deployment script and further recommend scheduling it to run monthly. Doing so ensures a full inventory is sent monthly and includes various tests to help alert you, through the Upgrade Readiness solution, to potential issues. This is frequently accomplished by creating a package in SCCM and deploying that package to your collection(s).
What you can do if you don't have SCCM
Not every customer has SCCM or a similar client management solution. And few are content waiting for results after configuring settings via Group Policy or MDM. To avoid having your client administrators walk from PC to PC to manually run the deployment script, you might consider configuring Group Policy Preferences to create a couple Scheduled Tasks that will automate the initial configuration of Upgrade Readiness and schedule the deployment script to run monthly as recommended. Let's review how to set this up step by step!
Step 1: Prepare an Upgrade Readiness folder on a network share
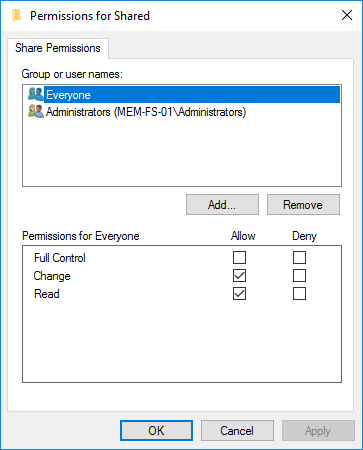
We'll store the Upgrade Readiness script on a network share that's available to clients. This will give us a central location to manage settings and makes it simple to upgrade the script when a new version is released. First extract the Upgrade Readiness deployment script, then place the contents of the Deployment folder on your file server. In my case, I placed it in a subdirectory of an existing share. Since the script will be run as the Local System account, you'll need to next ensure all your computer accounts have read access to this folder on this share. I usually do this by granting the Everyone group Change and Read permission on the share and limiting NTFS permissions on the folder in question as shown below. Finally, don't forget to ensure your RunConfig.bat is configured properly 

Step 2: Prepare the Group Policy Object
We're going to use Group Policy Preferences to create two Scheduled Tasks. The first will be an Immediate Task and will be responsible for running the Upgrade Readiness deployment script the first time the Group Policy is applied. The second Scheduled Task will be configured to run the Upgrade Readiness deployment script once per month. To get started, open the Group Policy Management mmc, browse to and select Group Policy Objects in the tree view, and finally select New from the Action menu. Next, provide a name for the GPO and click OK. I chose to call mine Upgrade Readiness . Before we edit the GPO, there's one more thing I like to take care of. Since we'll only be working with Computer settings, select the new Upgrade Readiness GPO in the tree view and move to the Details tab. Click the drop-down next to GPO Status and choose User configuration settings disabled . Now right-click the new Upgrade Readiness GPO in the tree view and choose Edit… to open the Group Policy Management Editor . Browse to Computer Configuration > Preferences > Control Panel Settings > Scheduled Tasks . Here's where we'll create the two new Scheduled Tasks.
Step 3: Create the initial Scheduled Task
Let's start by creating the Immediate Task. Right-click on Scheduled Tasks in the tree view, then click New > Immediate Task (At least Windows 7) . Then configure it as described below.
General Tab
- Name: Upgrade Readiness (Initial)
- Description: This Scheduled Task executes the Upgrade Readiness deployment script once upon initial application.
- User: NT AUTHORITY\System
- Run whether user is logged on or not
- Run with highest privileges
- Configure for: Windows 7, Windows Server 2008 R2

Actions Tab
- Action: Start a program
- Program/script:

Conditions Tab
- Start only if the following network connection is available: Any connection

Settings Tab
- No changes required

Common Tab
- Apply once and do not reapply

Step 4: Create the recurring Scheduled Task
Now let's create the Scheduled Task. Right-click on Scheduled Tasks in the tree view, then click New > Scheduled Task . Then configure it as described below. I've chosen to run the deployment script on the first Monday of each month. You can choose whatever schedule best meets your needs.
General Tab
- Name: Upgrade Readiness (Recurring)
- Description: This Scheduled Task executes the Upgrade Readiness deployment script once a month.
- User: NT AUTHORITY\System
- Run whether user is logged on or not
- Run with highest privileges
- Configure for: Windows 7, Windows Server 2008 R2

Triggers Tab
- Begin the task: On a schedule
- Settings: Monthly
- Months:
You must be a registered user to add a comment. If you've already registered, sign in. Otherwise, register and sign in.